
A Beginner’s Guide to Organizing Photos on Your Phone
Why Organizing Your Photos Matters
Your phone makes it easy to take photos whenever something catches your eye. Over time, however, your photo library can become crowded with screenshots, duplicates, blurry images, downloads, and forgotten pictures.
A little organization can make a big difference. You will be able to find important memories faster, free up storage space, and enjoy your favorite photos without scrolling through thousands of unrelated images.
The key is to start with simple habits rather than trying to organize everything perfectly in one day.
Start With a Quick Cleanup
Before creating albums or adding labels, remove photos you no longer need. A quick cleanup can make the rest of the process much easier.
Open your phone’s photo app and look for these common types of unwanted files:
– Blurry or accidental photos
– Duplicate images
– Screenshots you no longer need
– Old shopping or travel information
– Downloaded pictures
– Videos you would not watch again
– Images with poor lighting or unclear subjects
Work in small groups instead of reviewing your entire library at once. For example, clean up the past month first, then move on to older photos when you have time.
Most photo apps place deleted items in a temporary folder. Check this folder after you are sure you do not need the files. Emptying it can help recover storage space, but remember that deleted photos may not be recoverable afterward.
Use Albums for Major Categories
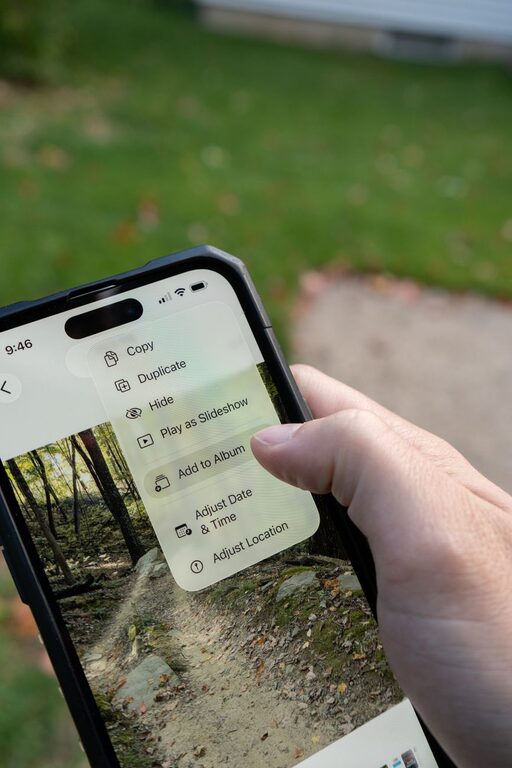
Albums are one of the easiest ways to organize photos. They let you group related images without changing the order of your main photo library.
Create albums based on categories that make sense for the way you use your photos. Helpful examples include:
– Family
– Friends
– Pets
– Travel
– Holidays
– School or work
– Recipes
– Home projects
– Important documents
– Favorite photos
Avoid creating too many albums at the beginning. If every small event has its own album, you may spend more time deciding where a photo belongs than finding it later.
Start with five to ten useful categories. You can always add more as your library grows.
Choose Clear Album Names
Use names that are easy to understand at a glance. “California Trip 2025” is more useful than “Vacation,” especially if you take several trips over the years.
For events, include the place, occasion, or year when it helps. Examples include:
– Birthday Party 2025
– Beach Weekend
– Garden Project
– New York Trip
– Pet Photos
Clear names reduce the need to open several albums just to find the right one.
Take Advantage of Automatic Features
Many modern photo apps can recognize dates, places, people, objects, and types of media. They may also group similar photos or suggest albums.
Explore features such as:
– Search by date or location
– Search by words like “dog,” “beach,” or “food”
– Face or people grouping
– Suggested memories
– Screenshots and videos categories
– Duplicate photo detection
– Recently added folders
These tools can save time, but they are not always perfect. Review automatic groups before relying on them. A photo app may identify an object incorrectly or place a picture in a category that does not match your needs.
Automatic tools work best when combined with a few simple albums and regular cleanup.
Organize Screenshots and Downloads
Screenshots often become one of the largest sources of clutter. They may include temporary information such as appointment details, product pages, directions, or messages.
Create a regular habit of reviewing your screenshots. Ask yourself whether each image is still useful. If you need to keep one, move it to a relevant album or save the information somewhere more appropriate.
For example, a recipe screenshot could be added to a recipe album. A home improvement idea could go into a project album. Temporary information should be deleted once you no longer need it.
Some phones automatically separate screenshots from camera photos. If yours does, check that folder during your weekly or monthly cleanup.
Select and Store Your Best Photos
When you take several similar photos, choose one or two favorites instead of keeping every version. Look for the image with:
– The clearest focus
– The best facial expressions
– Good lighting
– A useful composition
– The fewest distractions
You do not need to delete every extra image immediately. If you are unsure, place possible favorites in a temporary album such as “Review Later.” Return to that album after a few weeks. You may find that choosing the best images becomes easier with time.
For important events, consider creating a small highlight album. A collection of 20 strong photos is often more enjoyable to view than hundreds of nearly identical images.
Back Up Your Photo Library
A phone is convenient, but it should not be the only place where you store important photos. If the phone is lost, damaged, or replaced, you may lose pictures that are not backed up.
Use a trusted cloud photo service, a computer, an external storage device, or a combination of these options. Check the service settings to make sure automatic backup is enabled and that your photos are uploading successfully.
Keep these points in mind:
– Confirm when the last backup was completed.
– Check whether videos are included.
– Make sure there is enough storage space.
– Review the account connected to the backup service.
– Avoid deleting photos from your phone until you understand how syncing works.
Backup and sync are not always the same thing. In some services, deleting a photo from one device may remove it from other connected devices as well. Read the service’s instructions before making large changes.
Create a Simple Maintenance Routine
Organizing photos is easier when it becomes a small, regular task. Set aside ten to fifteen minutes once a week or once a month.
During each session, you can:
- Delete blurry and accidental photos.
- Review screenshots and downloads.
- Remove duplicate images.
- Add important photos to albums.
- Check that your backup is working.
- Review available storage space.
You do not have to finish your entire library during every session. Consistency matters more than speed.
You can also organize photos immediately after an event. After a birthday, trip, or celebration, select the best images while the details are still fresh. This prevents large piles of unorganized photos from building up.
Protect Privacy and Important Information
Your photo library may contain personal details such as addresses, travel plans, documents, or images of other people. Keep this in mind when sharing albums or using public links.
Before sharing a photo, check the background for information you did not intend to reveal. You may also want to avoid sharing images that include documents, tickets, account details, or private conversations.
For documents you need to keep, create a clearly named album or use a dedicated storage location. This makes important information easier to find and reduces the chance of accidentally sharing it with casual photos.
Keep Your System Simple
The best organization system is one you will continue using. You do not need dozens of labels, complicated folders, or a perfect naming method.
Begin with three steps:
- Delete photos you do not need.
- Create a few broad albums.
- Turn on a reliable backup.
Once those habits feel natural, add more categories or routines as needed. With a small amount of regular attention, your phone’s photo library can stay clean, searchable, and enjoyable to use.